The Arduino platform has taken microprocessor technology and electronics to a whole new level. Designing smart devices has become much easier and more enjoyable with Arduino. It's worth noting the abundance of libraries, documentation, and general information on the internet, both in articles and forums. After watching numerous videos online, I wanted to buy a beginner developer kit, priced at around $30, which included various sensors, buttons, displays, and motors. In addition to the kit, I decided to buy a network card with the ENC28J60 controller right away. This module allows you to connect your constructions to the local network and the internet.
For my first Arduino project, I chose to create a home web server that could monitor the temperature indoors and outdoors, humidity levels, and even track freezing or flooding conditions indoors (and other safety, household, or environmental warnings).
Key Features of the Device
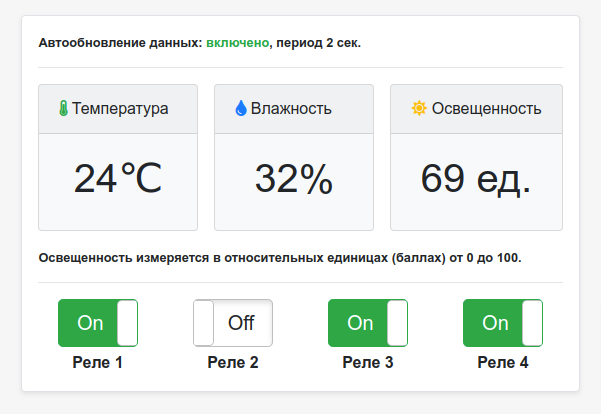
- Measurement of basic parameters - temperature, humidity, brightness.
- Control (on/off) of up to 4 loads using relays.
- User interface with the ability to work over the local network or via the internet.
Advantages of the Project
- Auto-update and data synchronization. This means that at any moment, whenever you connect to the device, you will immediately see the current values of the measured parameters, as well as the state of your loads (whether they are active or not). There is no need to refresh the page. Multiple devices can be connected simultaneously.
- No need to download third-party software.
- Compatibility with all devices. This means that you can connect to your controller from a PC, tablet, or smartphone with an internet browser. Just open the web utility available via the link and enter the IP address of your Arduino.
Although the web utility is available via a link, data exchange occurs directly between your browser and your Arduino. No third-party services receive information from your controller and cannot connect to it.
We will explain how to connect to your controller over the Internet in the next articles. This can be done in several ways, such as using a "white" IP, which can be ordered from your Internet service provider or using VPN.
Web utility is available via the link
Components Needed
Note
The DHT11 sensor is not very accurate - ±2 degrees Celsius for temperature and 5% accuracy for humidity. The new version of the DHT22 sensor has better accuracy. Temperature: ±0.5 degrees Celsius and 2%-5% accuracy for humidity. The firmware supports both sensors; you just need to adjust the sketch.
Steps to Make the Device Work
- Assemble the circuit.
- Download the sketch using the link below.
- In the sketch source code, set the IP address of your Arduino UNO.
- Flash your Arduino UNO.
- Open the web utility using the link below.
Editing Firmware Code
static byte mymac[] = { 0x74, 0x69, 0x69, 0x2D, 0x30, 0x31 }; // MAC address of your Arduino (may not be edited)
static byte myip[] = { 192, 168, 1, 100 }; // IP address of your Arduino
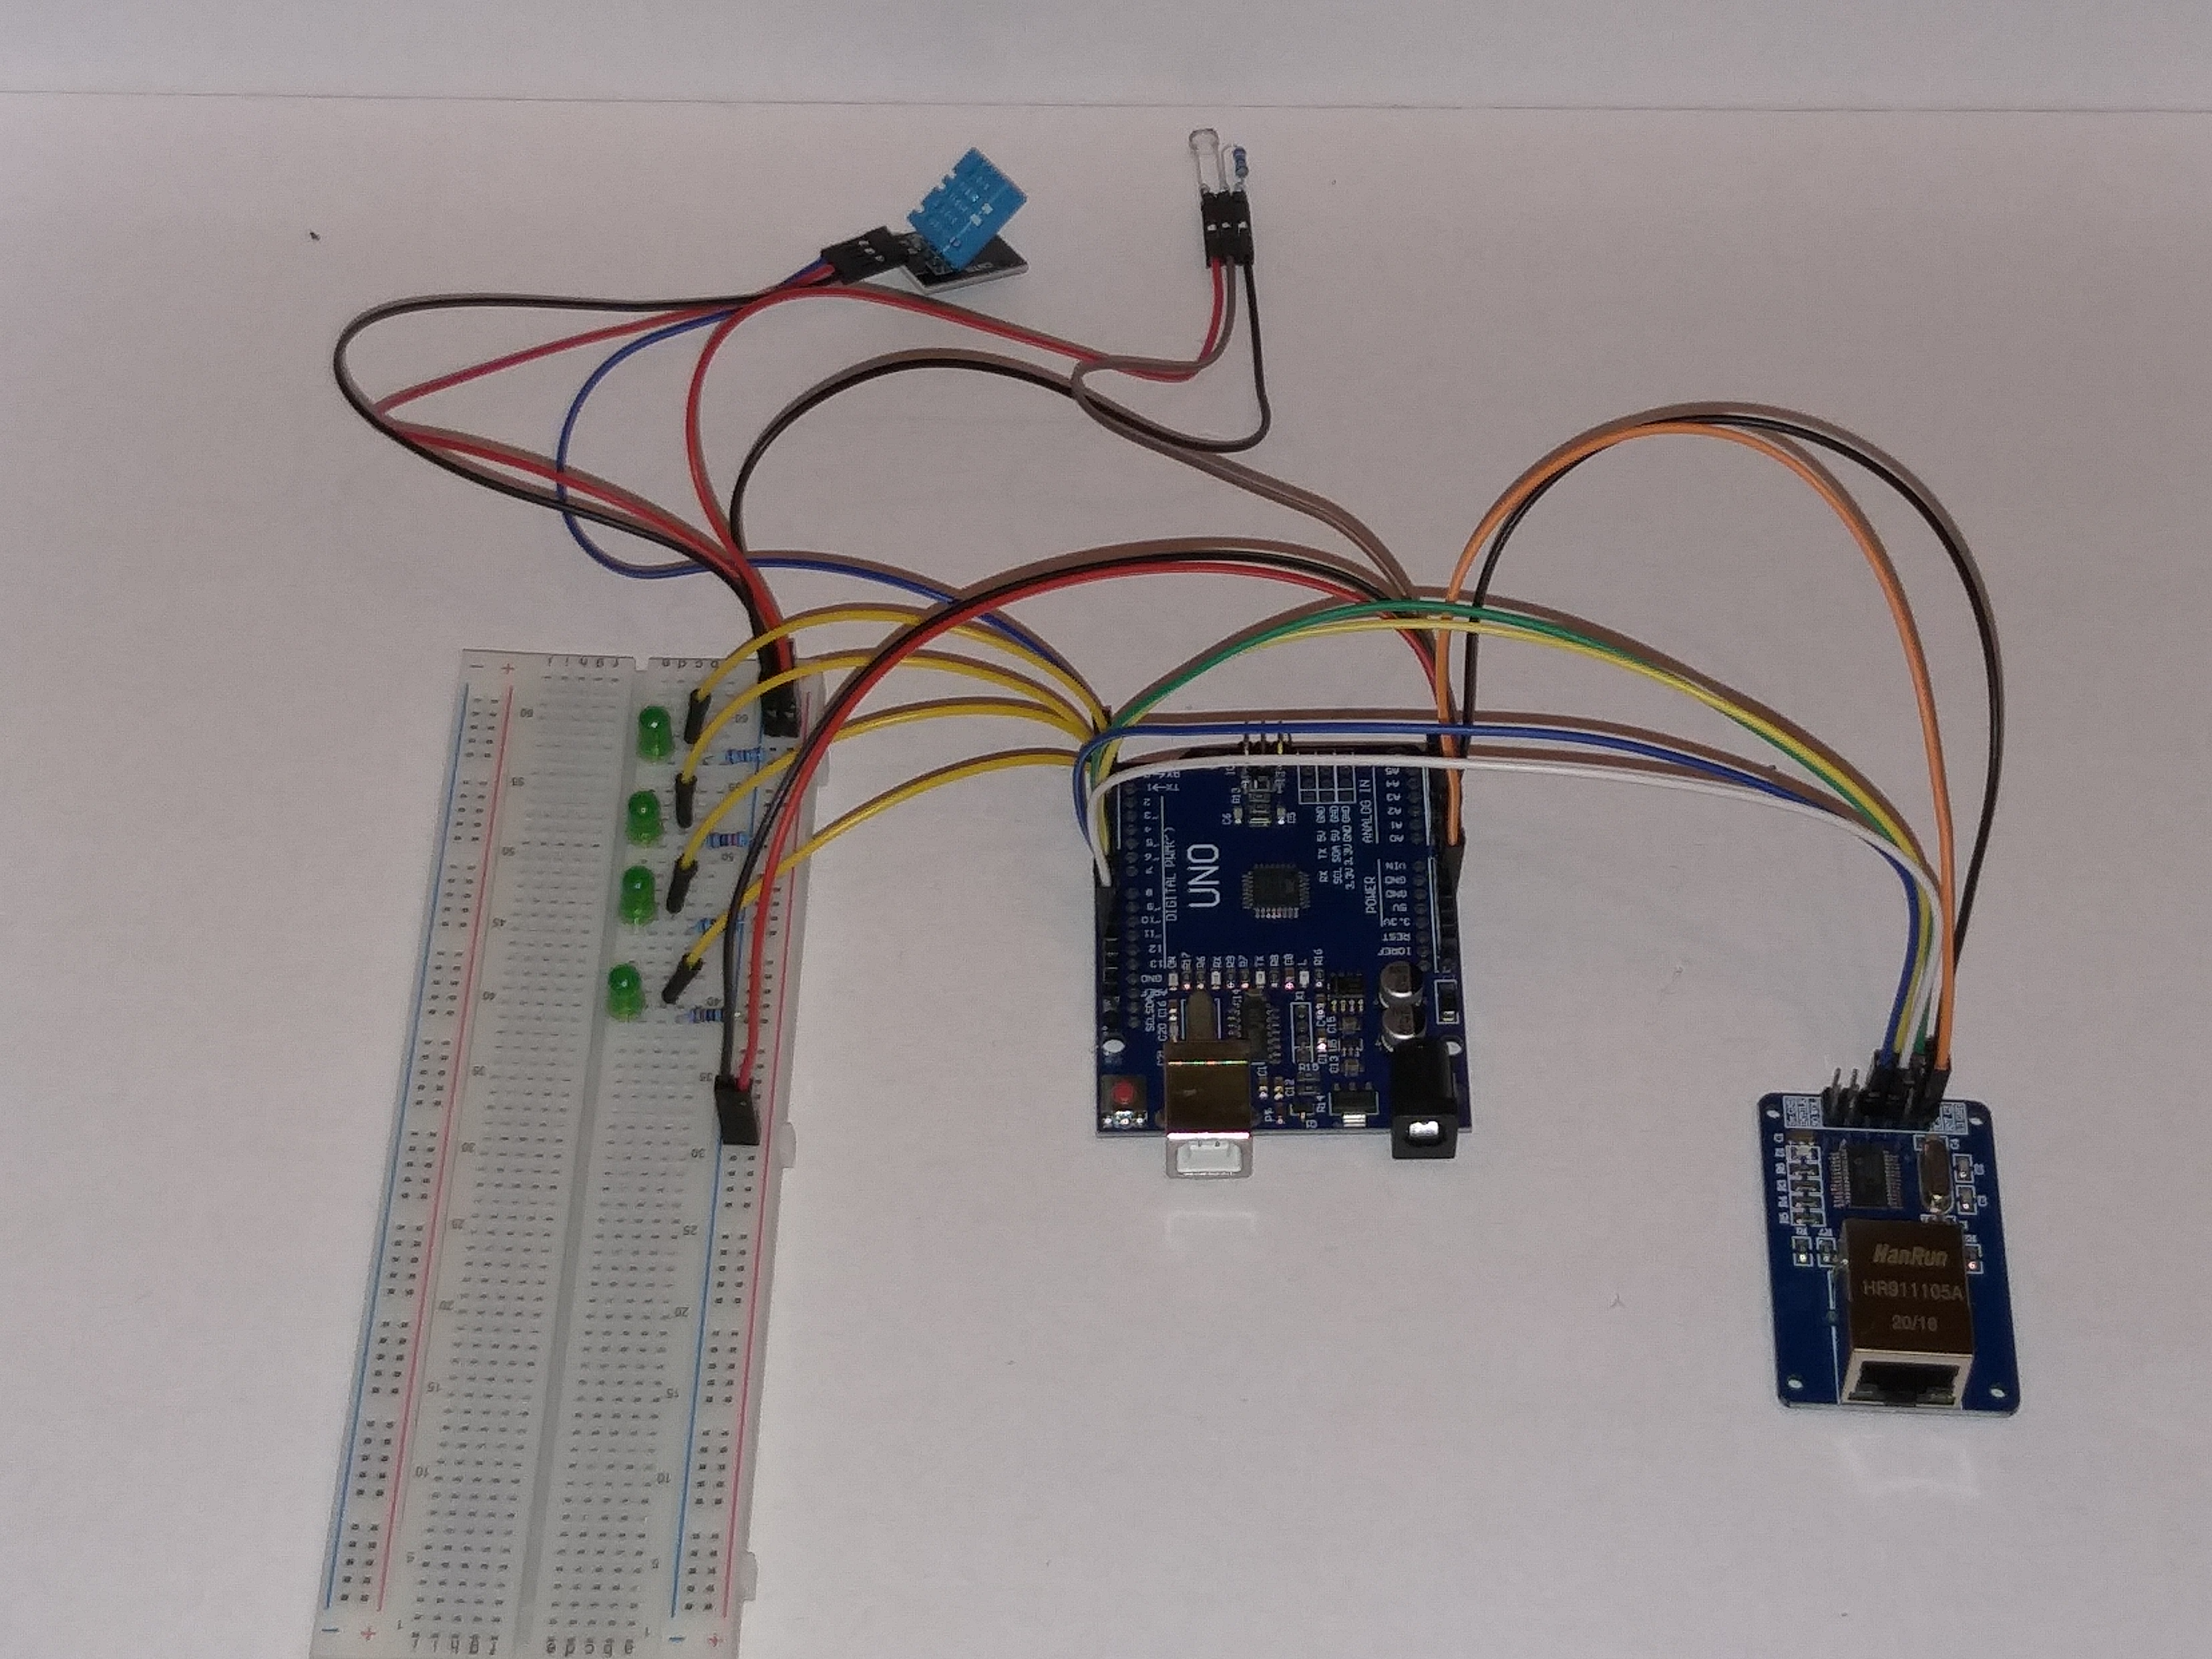
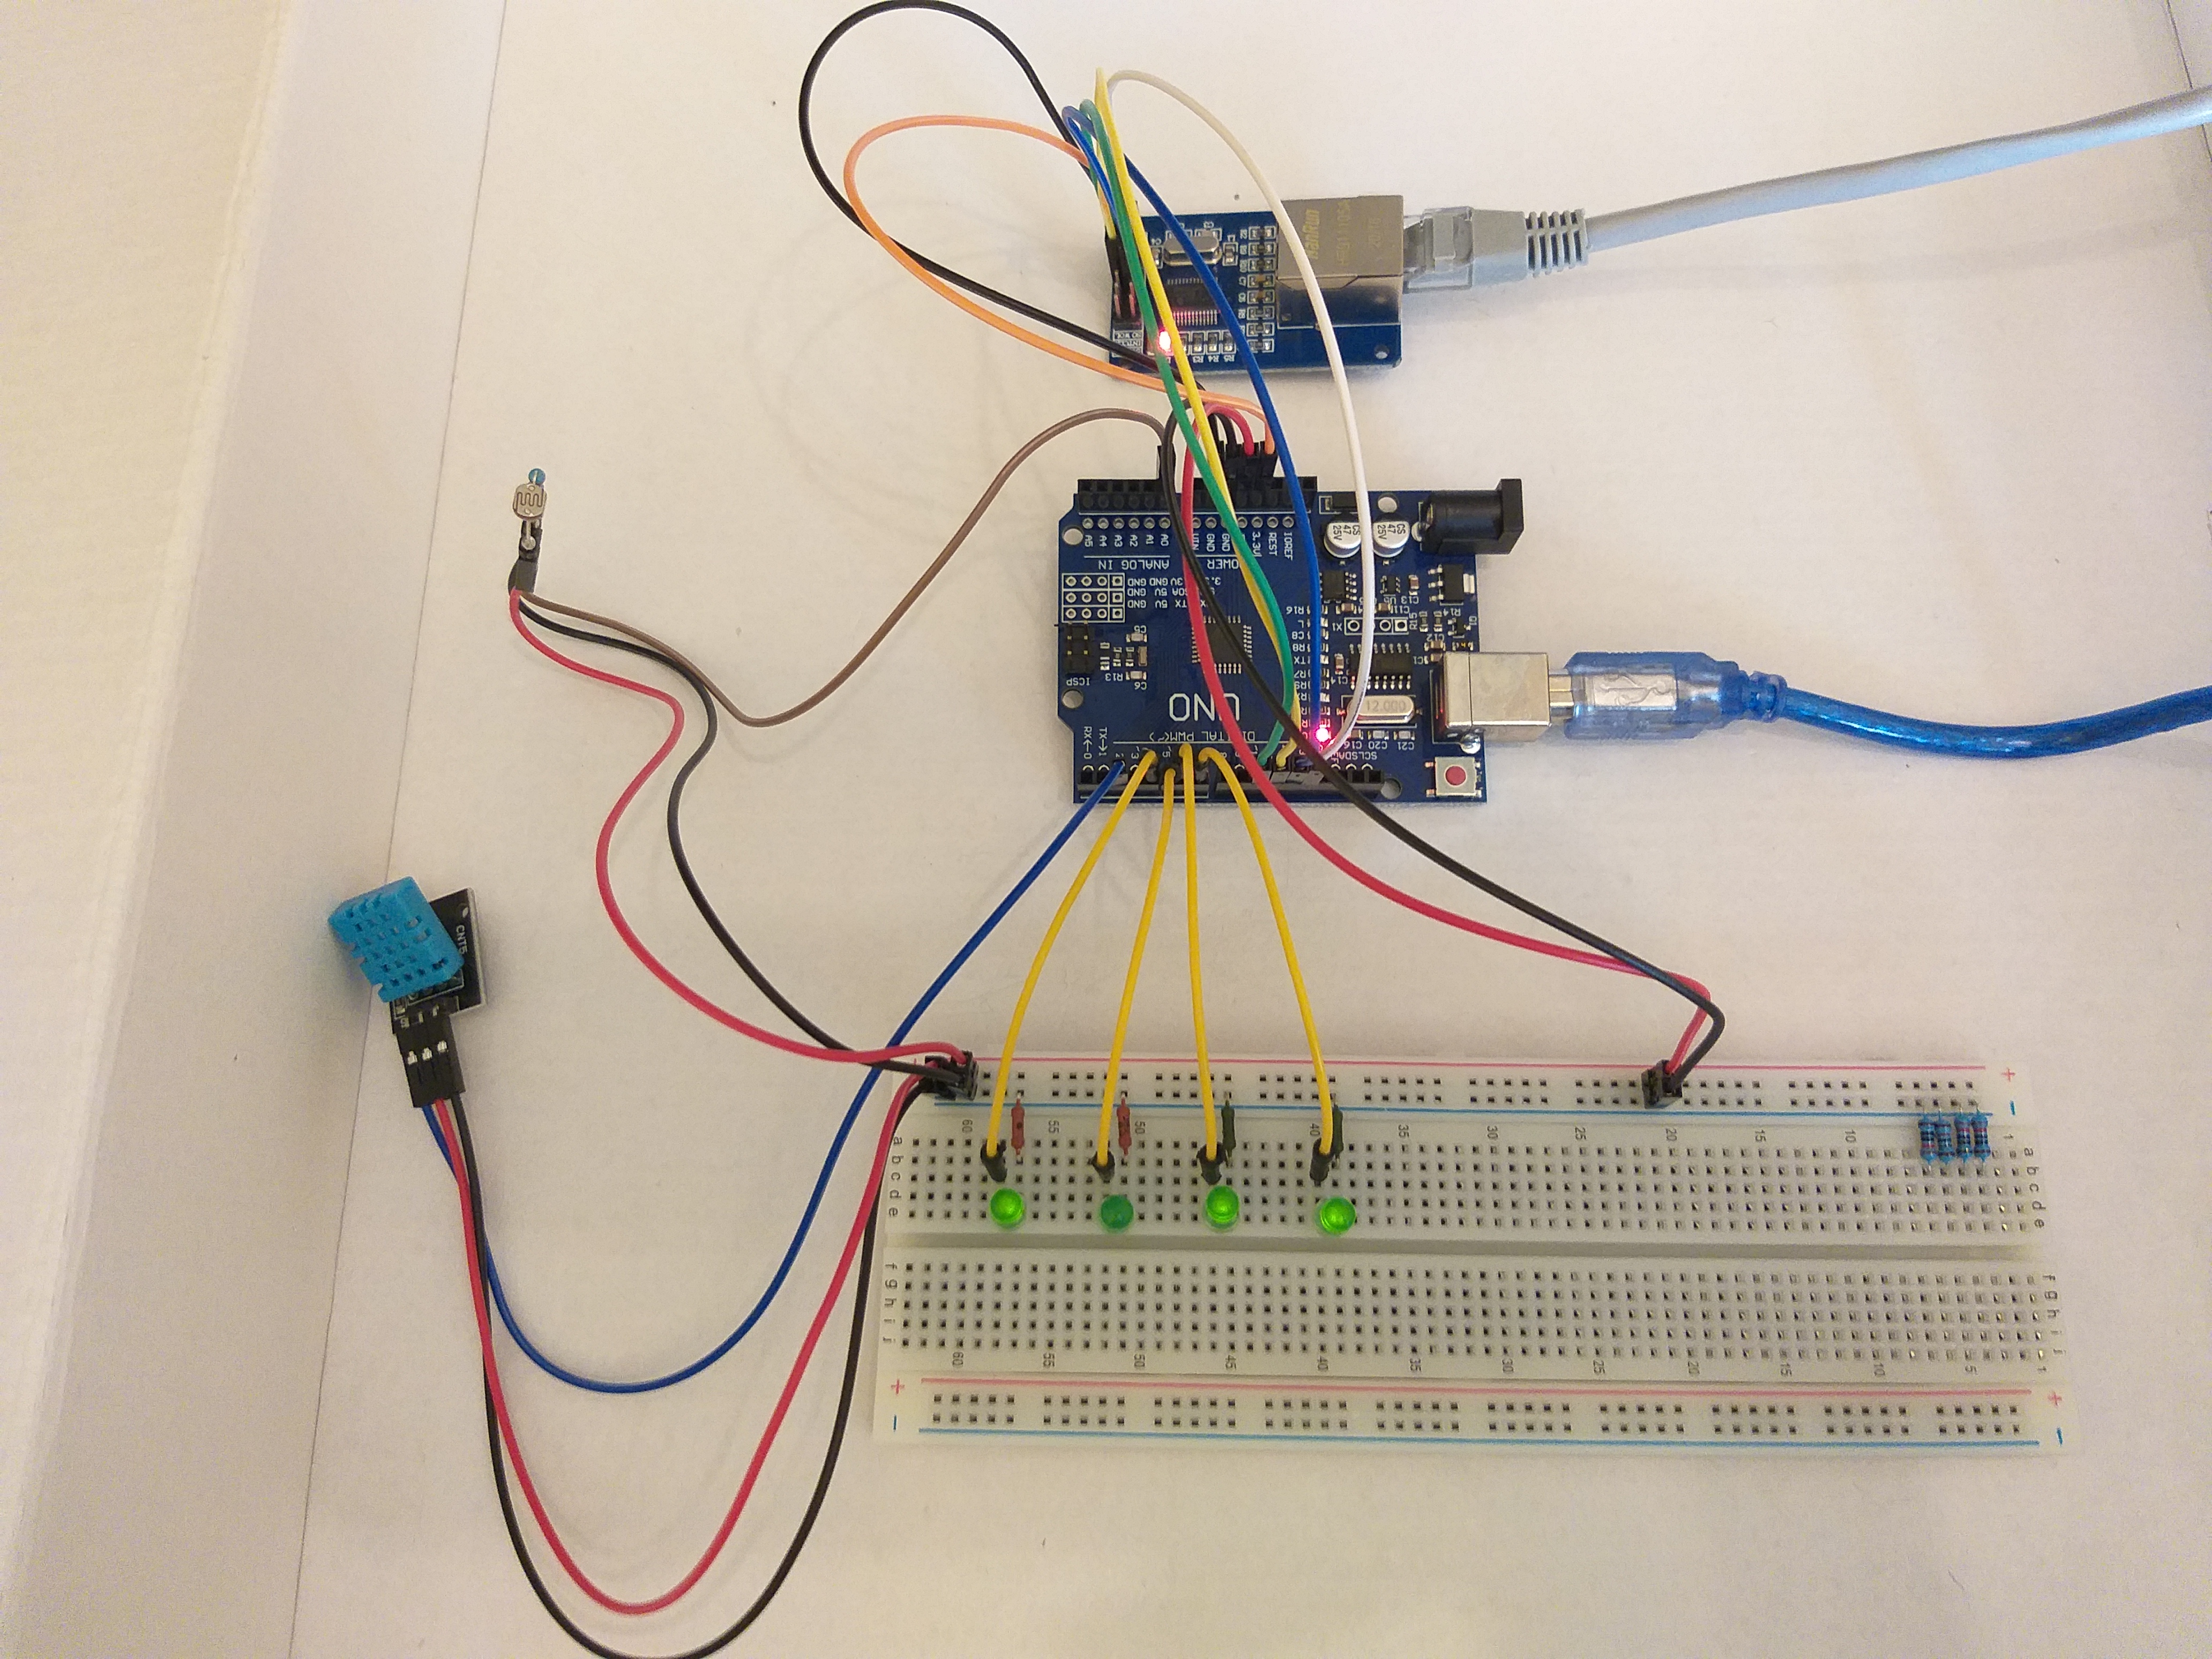
static byte gwip[] = { 192, 168, 1, 1 }; // Gateway IP address (router)Schematic Connection of Modules

Connecting Four-Channel Relay Module to Arduino UNO
| Arduino UNO | Relay Module |
| Pin 5V | VCC |
| Pin GND | GND |
| Pin 4 | Relay 1 |
| Pin 5 | Relay 2 |
| Pin 6 | Relay 3 |
| Pin 7 | Relay 4 |
Connecting DHT11 Sensor to Arduino UNO
| Arduino UNO | DHT11 |
| Pin 5V | VCC |
| Pin GND | GND |
| Pin 2 | DATA |
Connecting Light Sensor to Arduino UNO
| Arduino UNO | Light Sensor |
| Pin 5V | VCC |
| Pin GND | GND |
| Pin A0 | DATA |
Connecting ENC28J60 Module to Arduino UNO
| Arduino UNO | ENC28J60 |
| Pin 3.3V | VCC |
| Pin GND | GND |
| Pin 10 | CS |
| Pin 11 | SI |
| Pin 12 | SO |
| Pin 13 | SCK |
Photos of the Assembled Device
Note
At the time of building the project, I didn't have a four-channel relay on hand, so I used LEDs as status indicators for the relays.
Firmware - WebDHTLightRelay.ino
Web utility - link