In this article, we will explore a simplified version of the Arduino UNO weather controller. The scheme is minimalistic and contains only one sensor, making it ideal for beginners in electronics and programming who are learning to create IoT projects on the Arduino platform.
Components Needed
Steps to Make Your Device Work
- Assemble the circuit.
- Download the sketch from the link below.
- Specify the IP address of your Arduino UNO in the sketch source code.
- Flash your Arduino UNO.
- Open the web utility using the link below.
Edit Firmware Code
static byte mymac[] = { 0x74, 0x69, 0x69, 0x2D, 0x30, 0x31 }; // MAC address of your Arduino (can be left unchanged)
static byte myip[] = { 192, 168, 1, 100 };                    // IP address of your Arduino
static byte gwip[] = { 192, 168, 1, 1 };                      // Gateway IP address (router)
Circuit Diagram of Module Connections
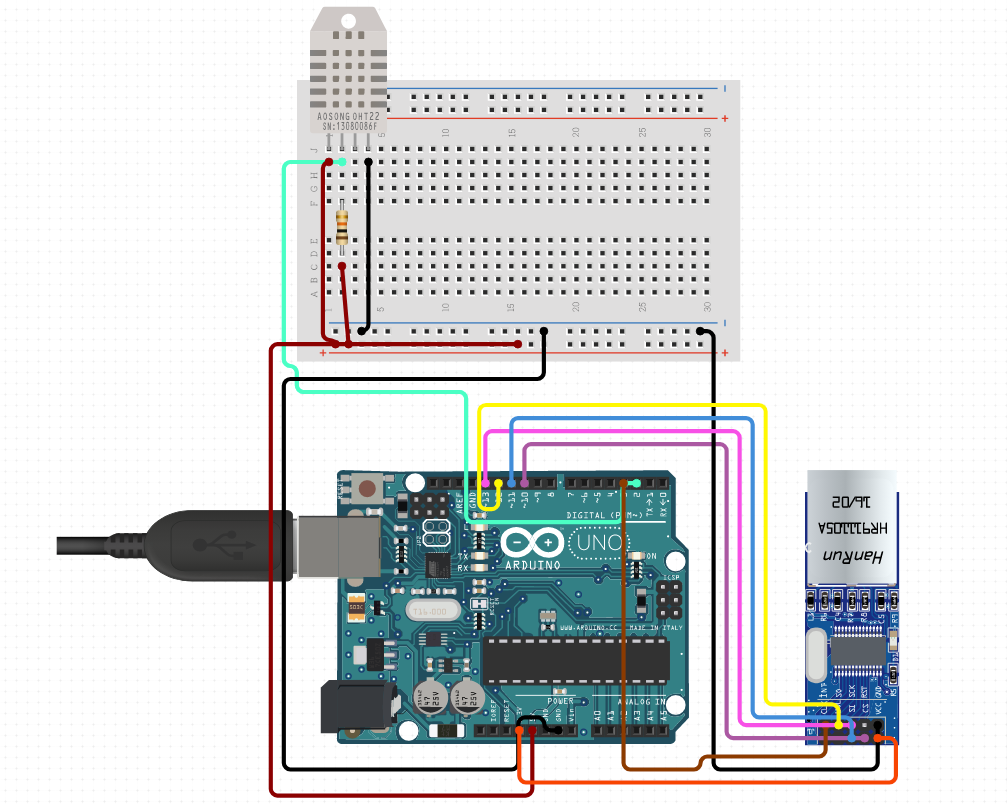
Connecting the ENC28J60 Module to Arduino UNO
| Arduino UNO | ENC28J60 |
| Pin 3.3V | VCC |
| Pin GND | GND |
| Pin 10 | CS |
| Pin 11 | SI |
| Pin 12 | SO |
| Pin 13 | SCK |
Connecting the DHT11 Sensor to Arduino UNO
| Arduino UNO | DHT11 |
| Pin 5V | VCC |
| Pin GND | GND |
| Pin 2 | DATA |
Web Utility Looks Like This
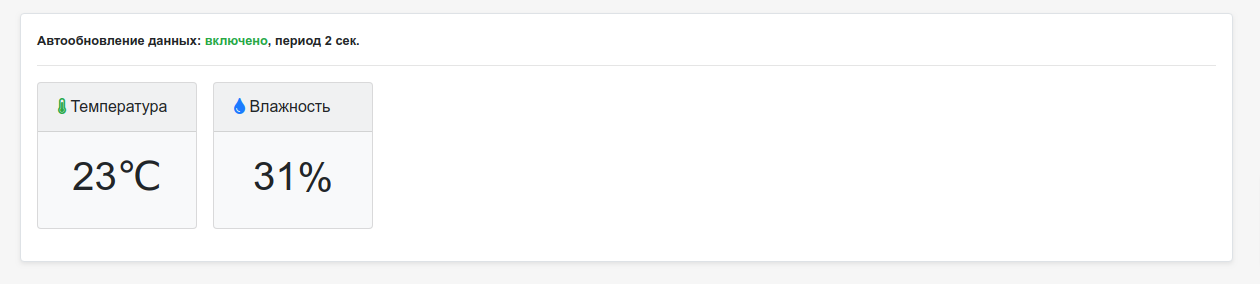
The web utility is available at this link
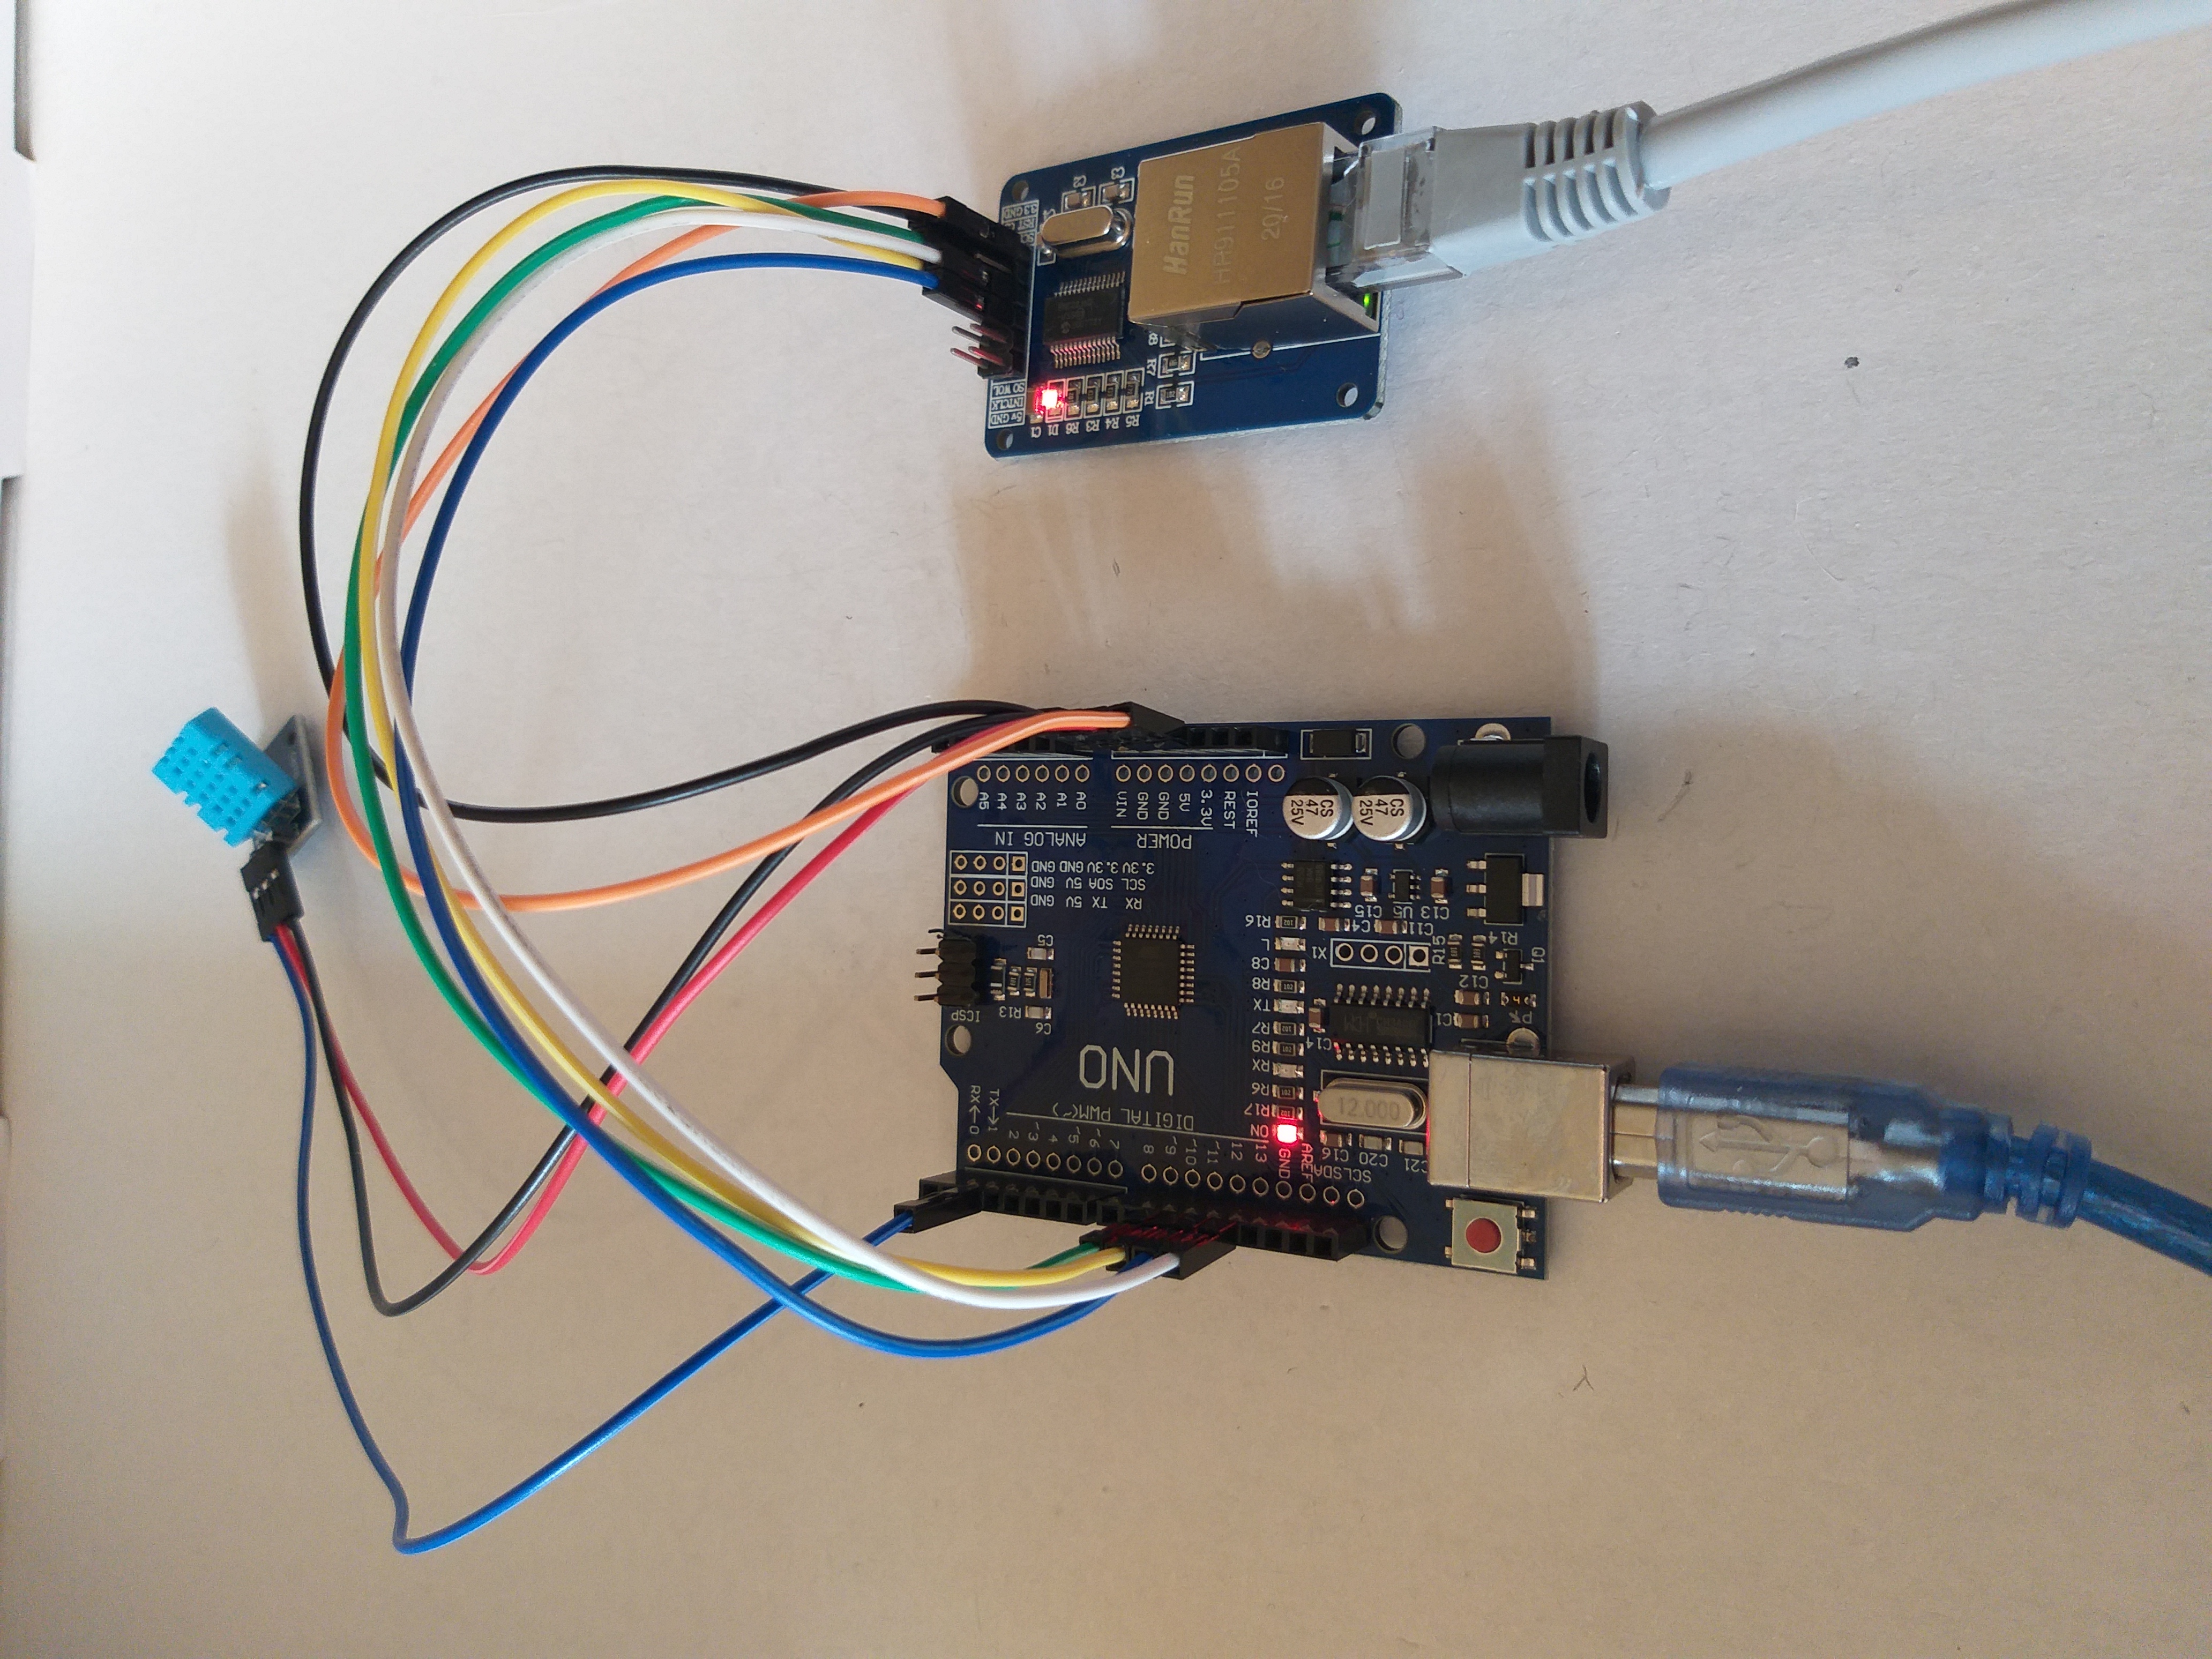
The Assembled Device Looks Like This
Project source code (sketch) - WebDHT.ino
Web utility - link